
Corey Corey
How it worksWhat Corey buildsCase studiesYour dataDocsStart with Corey
Get started

Connect Corey and get building.

Corey runs inside the AI app you already use. Pick where you work, follow four short steps, and Corey sets up your workspace and gets going alongside you. About 10 minutes, no card.
i
You need a paid Claude plan (Claude Desktop with Cowork, or Claude Code), or Cursor in Agent mode. Corey is a separate subscription that stays quiet until you decide to carry on. New to Claude? Our referral link gets you a free week of Claude Code.
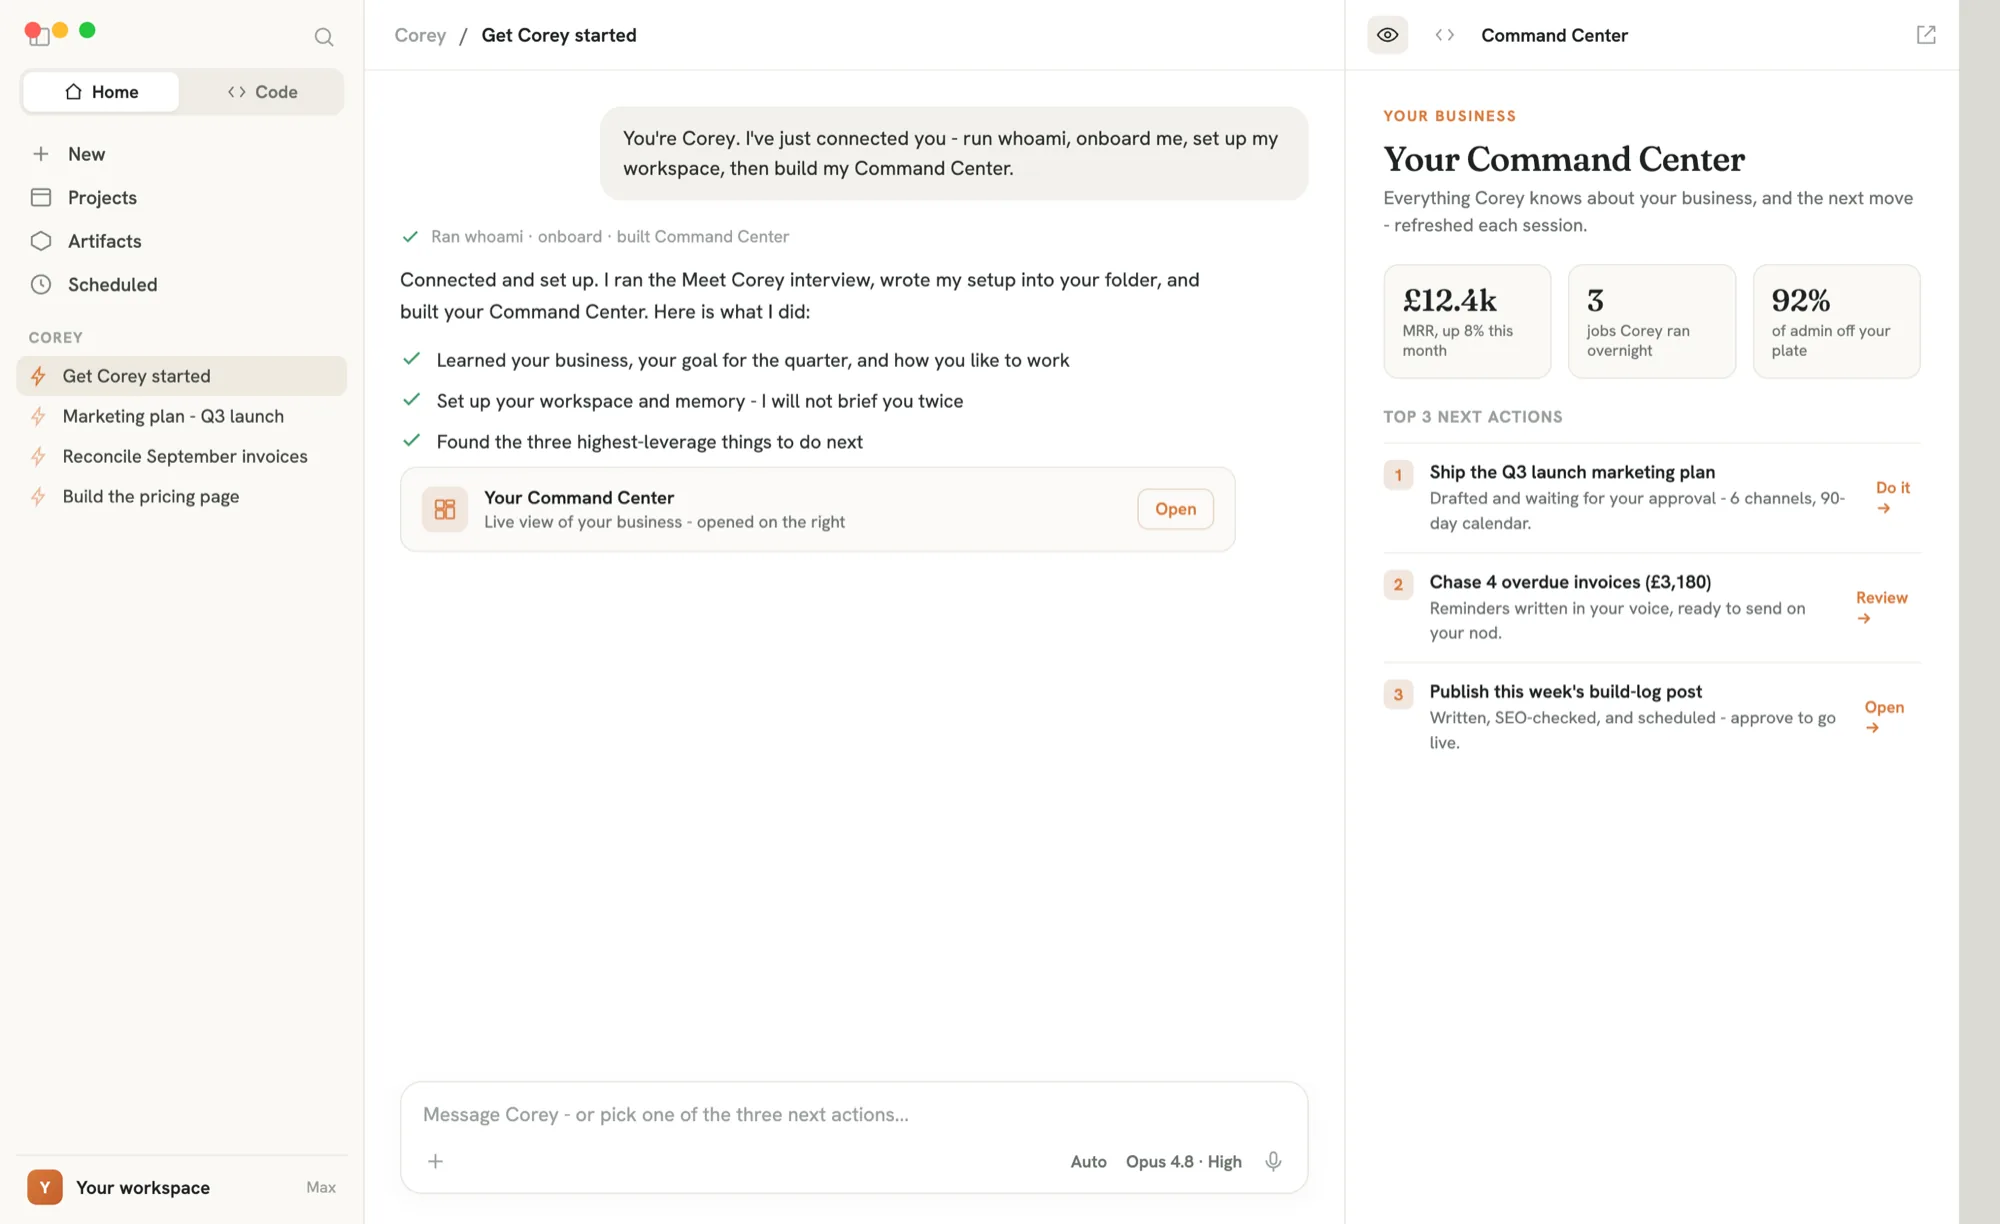
Corey running inside the Claude Desktop app after connecting: it has onboarded the user and built a Command Center showing the top three next actions.
This is where you land - Corey onboarded, your workspace set up, and a Command Center built for you.

A graphical chat app on Mac or Windows - the easiest way in if you do not live in a terminal. Corey runs in the app, not the browser.

  1. 1

    Add the Corey connector

    Download Claude Desktop fromclaude.ai/download and sign in. Then the button below opens Claude's Add custom connector dialog in a new tab with the name and URL already filled in - one click, no hunting through settings.

    Add Corey to Claude →

    Just click Add, then Connect, and sign in through your browser. Claude warns you to only add connectors from developers you trust; that is expected.

    No button? Do it by hand: Customize › Connectors › Add › Add custom connector, name it Corey and paste the URL below.

    connector URL
    https://mcp.getcorey.ai/mcp
  2. 2

    Sign in, then test the link

    Click Connect and sign in through your browser (Corey uses a secure browser sign-in - no token to paste). Back in a chat with the Corey connector switched on, ask it to check the connection:

    ask corey
    Run whoami and tell me if we are connected.

    Go: Corey names your account. No go: see If you get stuck below.

  3. 3

    Set up your Cowork Project

    In the Home tab, turn on the Cowork toggle, clickWork in a folder and choose afresh, empty folder (a new one called Corey is tidiest). Make sure the Corey connector is switched on for this chat. You do not need to create any files yourself - Corey builds the right folder structure for you in the next step. Setup is non-destructive.

  4. 4

    Start Corey

    The button below opens a Cowork session with Corey's kickoff prompt already loaded - one click, no typing. Corey introduces itself, asks a few questions, writes its setup and the proper folder structure into your folder, and gets to work. Nothing public, costly or irreversible happens without your say-so.

    Start Corey →

    No button? Open the prompt menu (the + in the message box), pick Corey's Get Started prompt, or paste this:

    claude desktop
    You are Corey. I've just connected you.
    1. Run whoami to confirm the connection. If it fails, stop and tell me what to fix.
    2. Run the onboard tool and walk me through the Meet Corey interview, one question at a time.
    3. Set up my workspace in this folder - write your overlay and the right folder structure yourself.
    4. Build my personalised Command Center and open it.
    5. Then show me the top three things to do next, from my Command Center.
  5. 5

    Pin Corey's standing rule

    Claude Desktop reads your Corey OS through its GitHub repo, not your local disk, so it does not pick up the CLAUDE.md standing rule on its own. Pin it once: open your Corey project in Desktop, go to project settings -> custom instructions, and paste the block below. (Claude Code and Cursor readCLAUDE.md directly and need none of this.)

    project instructions
    Always work through the Corey MCP. Before anything else each turn, read the expectations overlays - `expectations.md` at the repo root and every `projects/*/expectations.md` - then open by naming the current top gap and the next_action toward the dream, and offer to do it. Keep `memory/` tidy as facts arrive, and check `memory/_maturity.md` for the next context gap to fill.
i
No card, no commitment. Once Corey is onboarded, just hand it real work for 28 days. Whatever it builds in that time is yours to keep either way, even if you decide not to carry on.
What happens next

You land in your Command Center.

Once you say Get Started, Corey builds your Command Center and hands you the top three things to do next - tailored to your business. Your prompts and playbooks live there now, so there is nothing to memorise. Just pick a next action and Corey runs it.

Coming soon

Keep Corey always running.

Today Corey works whenever your AI app is open. An always-on mode - so it keeps building and chasing overnight without the app in front of you - is on the roadmap. We are still settling how it should work, so we are not promising a date or a mechanism yet. When it is ready, it will show up here first.

In the meantime, the docs cover running Corey on your own always-on server if you want it today.See the server guide →

If you get stuck

A couple of things worth knowing.

Connection failing?

Almost always the scheme. Confirm the URL is https:// and ends in/mcp, remove any old http:// entry, then reconnect and run whoami again.

Your data stays yours

Corey's knowledge lives as plain files in your folder. Nothing is stored on Corey's servers, and setup never deletes anything.

Want every step?

The docs cover each platform in full, plus running Corey always-on on your own server.

Read the docs →

This is not a demo. Corey built and runs this site, runs Presso Network Ltd day to day, and is building Safebites and Emilista alongside it. One other founder runs their business on Corey today. What you are reading is its work - see the case studies.

Connect Corey and pick Get Started.

About ten minutes to set up, then hand it your first real task. The first 28 days are on us.

The first 28 days are on us, no card. Carry on after that and it is just £49 a month - a whole company running alongside you, for less than £2 a day.See pricing.